Three Battle Tested Ways to Install PostgreSQL
Having run over 100 students through my Ruby on Rails courses, I’ve come up with some straight forward ways to install PostgreSQL without too much pain. Here is how I do it:
PostgreSQL is a relational database manager, and it keeps getting more and more popular within the web development community. It has taken over from MySQL as the preferred tool for production quality, scalable databases. The rise in popularity is likely due to the backlash from Oracle purchasing and messing with MySQL, Heroku choosing Postgres as the preferred database in production, and Postgres’ faster introduction of new features like Arrays and HStore.
How to install on
How to Install Postgres on Mac OS X
This guide will show you how to install PostgreSQL, the easy way, on a Mac. This tutorial is designed for Max OS 10.9 - Mavericks. If you don’t have Mavericks, upgrade your mac first.
There are a lot of confusing options for installing PostgreSQL. In fact, your Mac most likely came with a system version of Postgres. However, that version is probably already out-of-date It may even be insecure! It is better to keep all programs you use for development in user space instead of installed system-wide, so that you don’t mess with what Apple configured the system to expect. A package manager is the perfect solution for helping you install and manage software packages, such as Postgress.
The most popular package manager for Mac OS X, and the one I prefer, is homebrew. Homebrew (often simply referred to as ‘brew’) makes it easier to install new software packages and keep them up-to-date. Brew also installs all the commands and tools needed to manage Postgres, and installs it all to the standard locations on your computer and in your path. This makes it easier to use them from the command line and easier for libraries like Ruby Gems and npm packages to interact with.
If you have MacPorts or Fink installed, this tutorial won’t work for you. I recommend switching to Homebrew, as it is better kept up to date.
Open up the Terminal
You’ll need to use the command line interface to complete many of these steps. Search for ‘terminal’ using OS X’s Spotlight, like so -
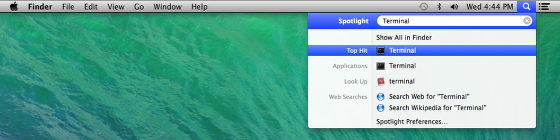
As a developer or other technical user of PostgreSQL, you’ll probably spend a lot of time in Terminal. You might want to put it on the Dock for quick access.
How To Install Homebrew
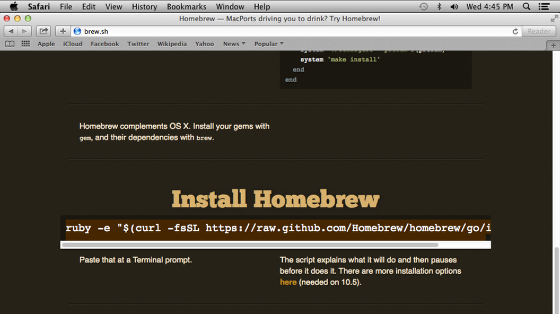
Copy the install command from the Install Homebrew section, near the bottom of the page at http://brew.sh. As of this writing, the install command is ruby -e "$(curl -fsSL https://raw.github.com/Homebrew/homebrew/go/install)", but you should probably check to make sure this is still correct.
Caveats:
Don’t re-install homebrew if you already have it; check using which brew. If you do already have it, make sure to run brew update to ensure you have the latest package info on your system. If you have homebrew installed via RVM (it happens), your paths will begin with /home/<your username>/.rvm/usr/local instead of just /usr/local - not to worry.
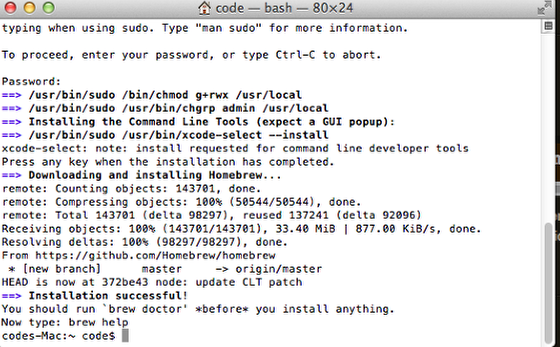
Start Homebrew Installation

Paste the command to install homebrew (mentioned above) into the Terminal. It should look somewhat like the picture above.
Install the Command Line Tools
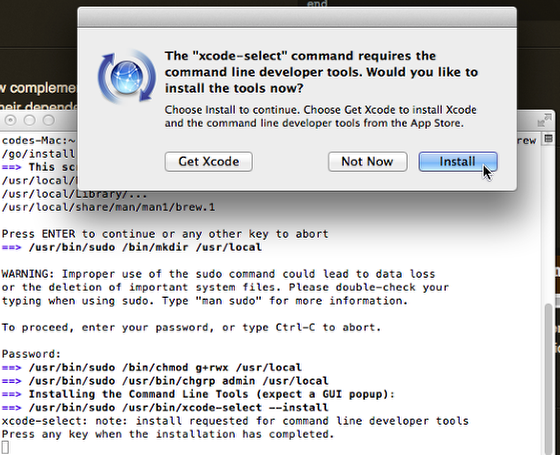
You may already have Xcode installed if you’ve been developing for a while, but if you see the dialog above, click Install and get some tea steeping; this may take a while.
Enter Your Password
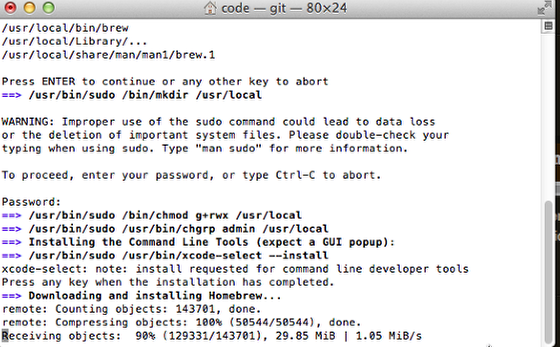
Homebrew will need your user password to set itself up. Enter it in the terminal when asked. Be careful typing, because you won’t see your typing echoed back to you. It may seem like it’s not working, but if you enter in your password, and then press return, it should work.
Homebrew Finishes!
You should see “Installation successful!”, as above. Next, run brew doctor to ensure that your new Homebrew installation is properly installed and configured.
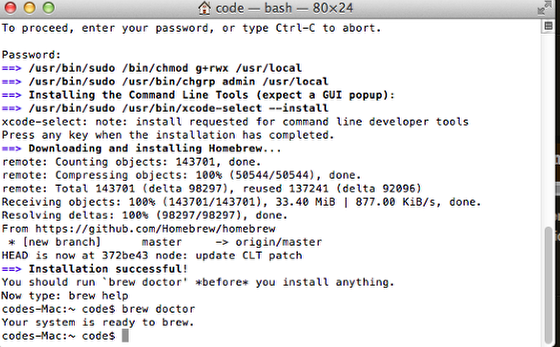
After running brew doctor, you should see “Your system is ready to brew”. If not, there should be instructions on how to fix each issue it finds.
Brew Install Postgres
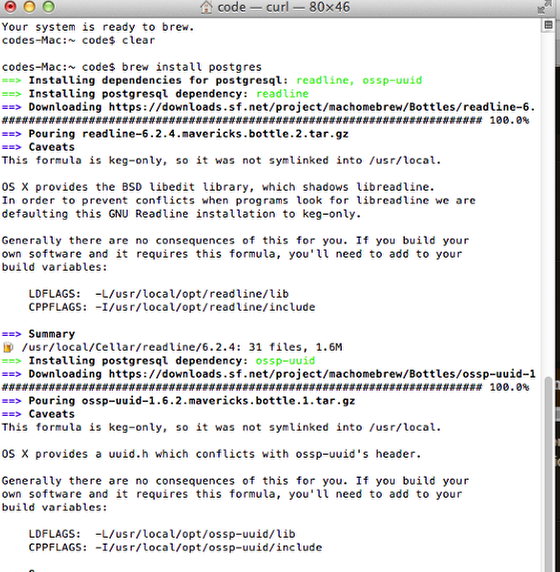
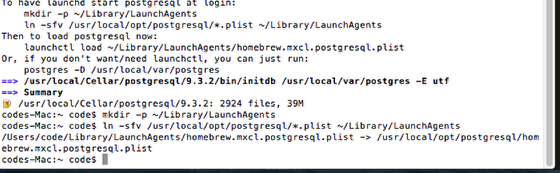
Enter brew install postgres to tell brew to install PostgreSQL for you. You’ll see many, many lines of text in Terminal, similar to the screenshot below.
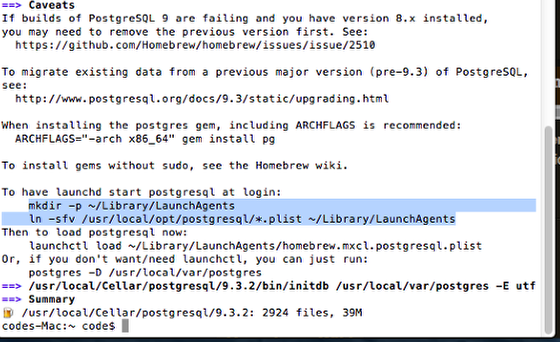
Make Sure to Read the Caveats!!!
It’s a lot of text scrolling by and the temptation is to skim over it. ALWAYS read the Caveats section when installing with Homebrew. It contains critical info. I’ll go over what you need.
Create the LaunchAgents Directory and Link the plist
You’ll probably want to set up your Mac to automatically run Postgres when it starts up; otherwise, you’ll have to remember to do so manually every time you restart.
The first command, mkdir -p ~/Library/LaunchAgents, creates a LaunchAgents directory (if it didn’t exist already).
The second command, ln -sfv /usr/local/opt/postgresql/*.plist ~/Library/LaunchAgents, creates a symbolic link to the postgres plist (property list) file.
Load the plist
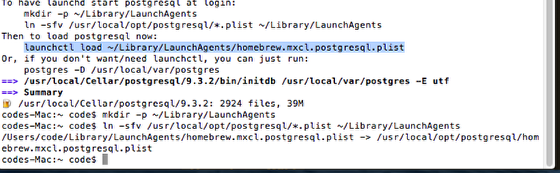
Enter launchctl load ~/Library/LaunchAgents/homebrew.mxcl.postgresql.plist from the homebrew caveats section. This will load the plist into the launch control service. Your PostgreSQL should now start up automatically when your Mac starts up.
Edit the System paths
Mac OS X comes with PostgreSQL built-in. But as mentioned above, this Postgres is probably out-of-date, which is why we’re installing a new one. Enter sudo nano /etc/paths into the Terminal. It will ask for your password. Be careful! Any command that starts with ‘sudo’ invokes ‘super user’ priviledges (thus, ‘sudo’ = ‘super user do’), and will allow you to make very serious changes to your computer’s configuration.
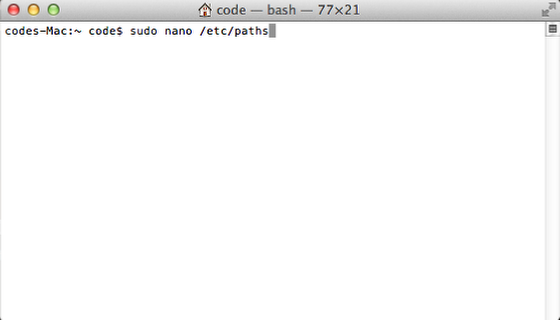
‘nano’ is a simple text editor, and this command will open your system’s ‘paths’ file for editing. Other text editors will work as well, if you open /etc/paths in them.
Default Paths
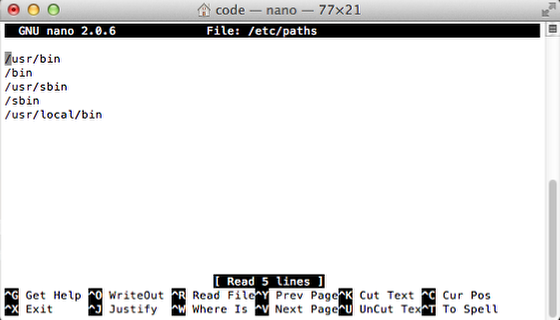
Copy (or retype) /usr/local/bin from the bottom of the file and put it at the top.
Finished Editing /etc/paths
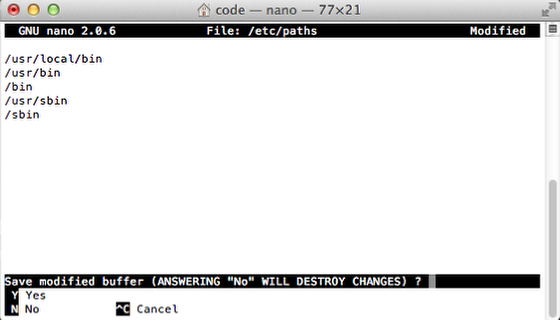
Press Ctrl-X to save the file and answer yes.
Write to /etc/paths
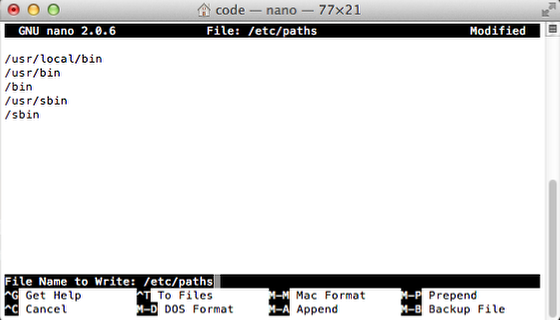
Hit enter to save the file in its existing location (/etc/paths)
Confirm the Changes
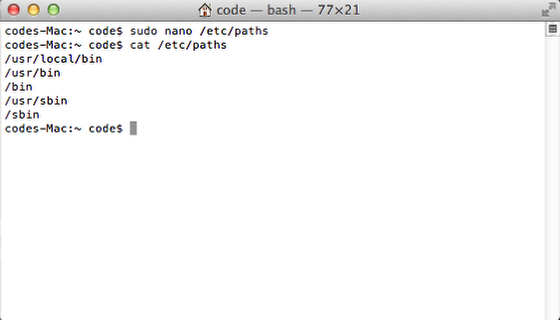
Enter cat /etc/paths in the Terminal. You should see the Terminal print the updated contents of your paths file, confirming that your changes were saved.
With the updated paths file, your Mac will find and use your brew-installed (new hotness) PostgreSQL installation, rather than the (old and busted) PostgreSQL that your Mac shipped with.
Reboot
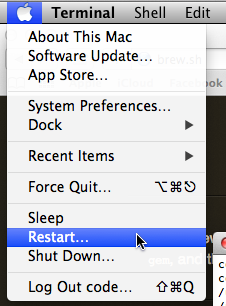
I know, this is Unix and not Windows. But this is seriously the easiest way to do this. Don’t skip this step.
Which psql
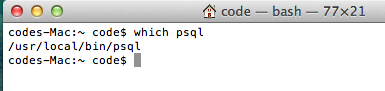
After rebooting, your which psql command should return /usr/local/bin/psql (unless, as mentioned above, your brew was installed via RVM, in which case which psql should return /home/<your username>/.rvm/usr/local/bin/psql)
Create a Default db Based on Your Username

Enter createdb `whoami` into the Terminal. Make sure to use backticks, just as shown in the command there. They are below the tilde (squiggly line) character underneath the escape key on a US keyboard. This makes it easier to use the psql command.
Try Out the psql Command
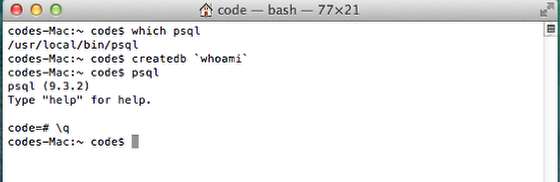
Enter psql. If you see something like the screenshot above, great! Your Postgres is up and running with no errors, happy as a clam.
Install the pg gem
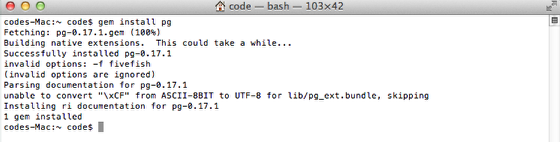
If you’re planning on using Postgres as part of Ruby on Rails, run gem install pg and you should be good to go.
How to Install Postgres on Windows
Installion of PostgreSQL on Windows is, thankfully, very straightforward: use the installer from Postgresql.org
You can accept all of the default options. Then you should be able to gem install pg, if you are using Ruby. If you are using JRuby, you may also want to install the optional JDBC driver for Postgres.
How to Install Postgres on Ubuntu Linux
Ubuntu is not exactly straightforward, but at least it’s well-documented. Choose the Basic Setup. Some other things that have helped students are mentioned in the Mac OS X section above. Basically, create an empty database based on your username so that it’s easier to get into using the psql command: createdb `whoami`.
For a development machine, it is also easier to set up your user with super-admin privileges. sudo -u postgres createuser --superuser $USER
Do You Have a Better Way?
I’d love to hear about how you install Postgres. Let me know via twitter.